Friday, November 05, 2010

Alas, from a snowflake to a frog

Crafting
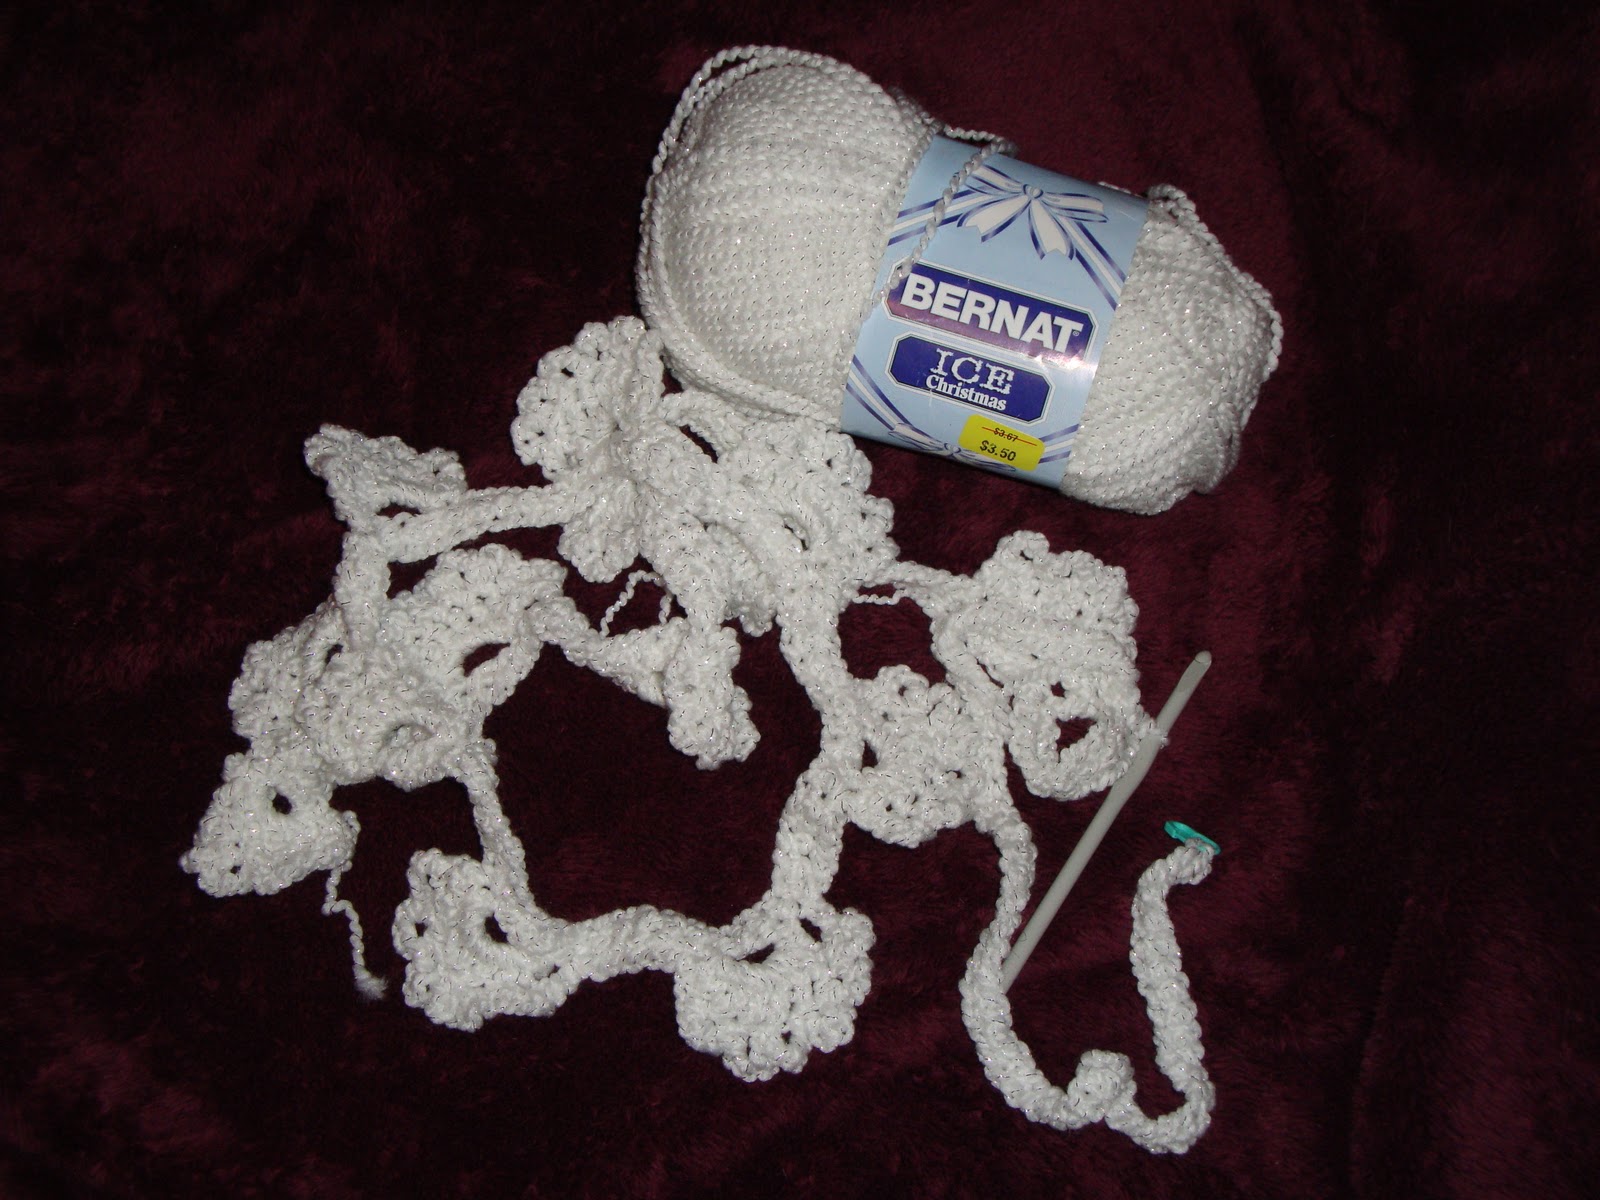
Falling Snowflakes Crochet Scarf
Where I am: After getting to the end of row 2, I am back at the beginning of row 2. Considering that row 2 is along 201 sc's and it involves doing "fans" which consist of several dc and sc and ch, it's a long way back. Can you say "rippit"?
How it's going: I'm trying to stay chipper. As I approached the end of the row, I started to get nervous, as I always do, wondering and hoping that everything would work out just right. But no, it wasn't meant to be. A few stitches from the end I realized that I would run out of sc from row 1. I somehow managed to use up one more sc along the way than I should have. And where was that sc, you ask? It was in the first fan, at the beginning of the row. I thought that maybe I could fake it and not have to rip. But wisely I counted the number of fans and compared with what the pattern called for (thank goodness the pattern says how many there should be). Even with one more fan, I would only have 21 in row 2 when 22 were called for. What the heck was going on? Well, I did think the fans looks a little asymmetrical and thought that odd. When the instructions at the end of the fan say "slip st in next sc" what I'm pretty sure they mean is "slip st in sc at end of fan where ch 3 is done to begin 2nd level of fan." I can see how it would be hard to specify which sc, but next sc is definitely not it. Perhaps a diagram would have been useful here.
Thoughts so far: Well, it's a quick project, theoretically, so I'm saddened but not devastated by the frogging. I just hope that when I get to the end of row 2 again there are 22 fans. My husband still thinks it will be pretty.


Exercising
Exercising went no where today. I just couldn't drag my sorry butt out of bed this morning. It didn't help that I knew I had to get to work earlier than usual today and couldn't be late. That meant I would have to do a shorter workout so I just shortened it to nothing. And I couldn't even bike to work because it was raining. I'd ordinarily bike in the rain but it's cold and I need to get a rain suit so I can keep my clothes dry. Oh well, there's always tomorrow.


Domestimication
Today I was tired. The thought of buying dinner briefly crossed my mind, but one of the big advantages of having a meal plan is that it puts me in the state of mind to cook what I've planned to cook. So pasta night it is!
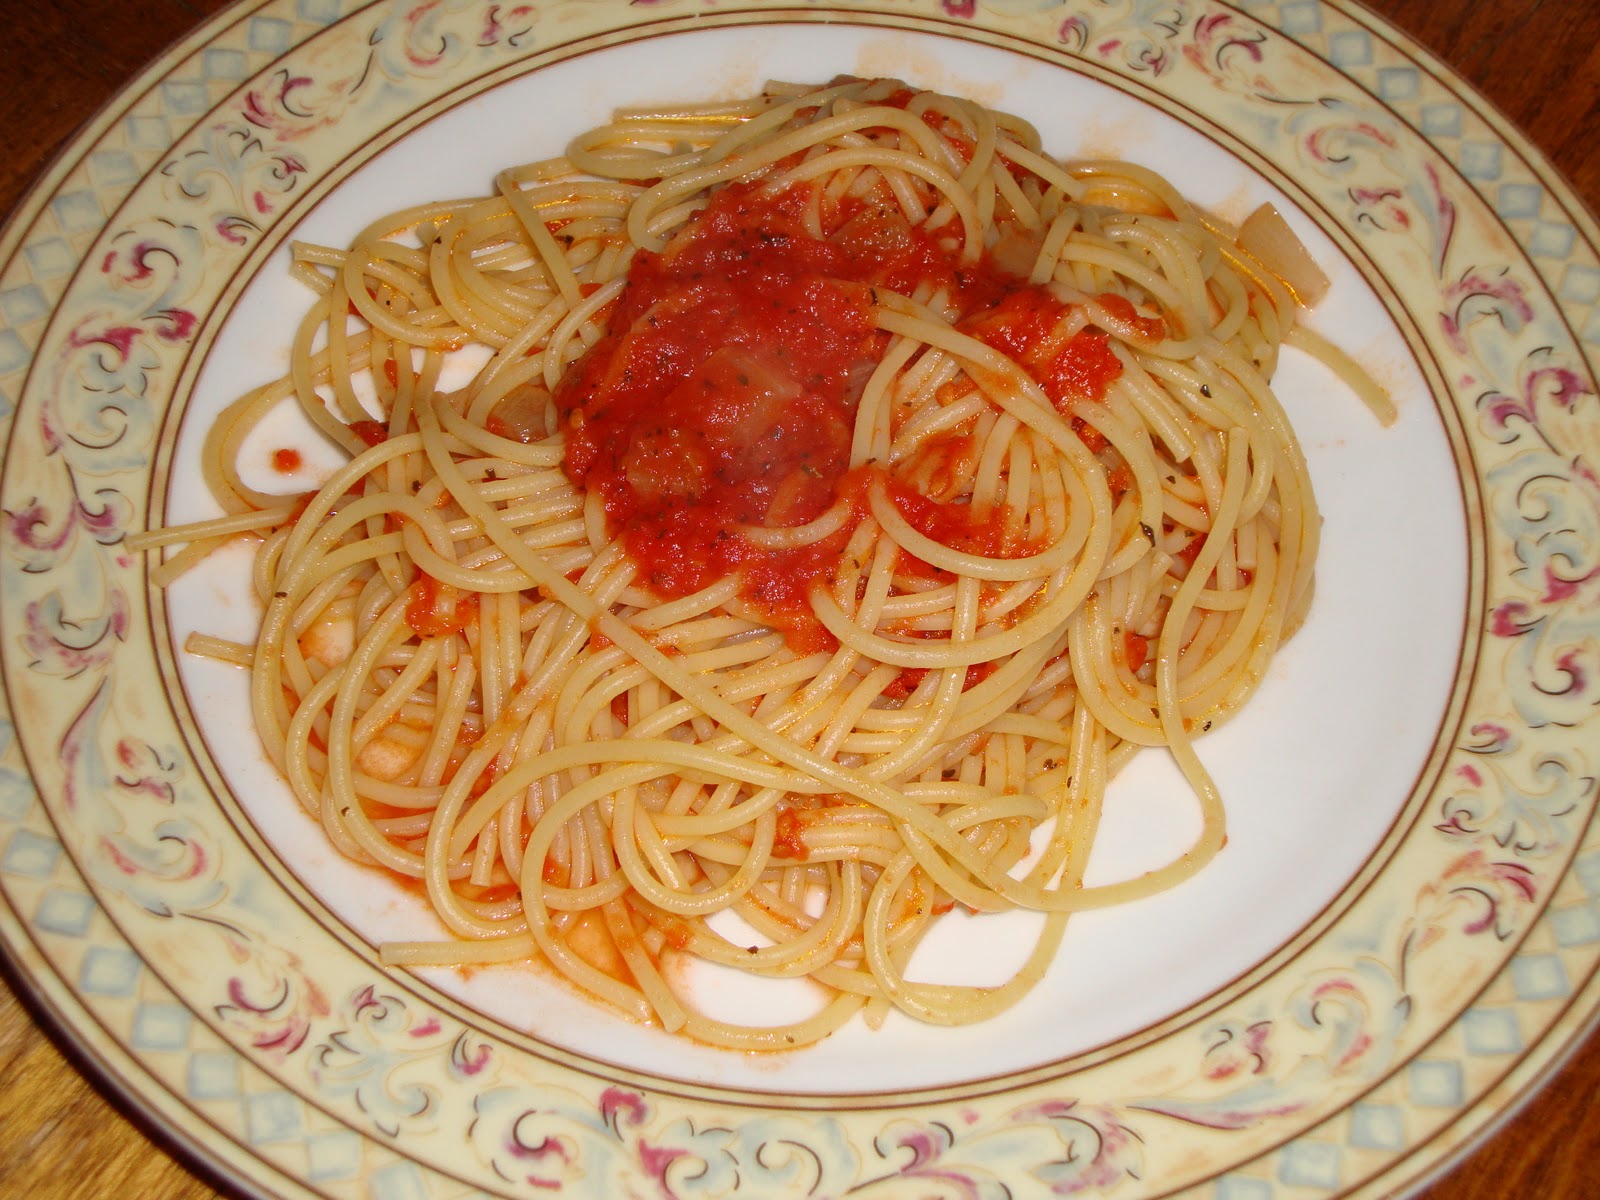
The sauce was very basic: a can of tomatoes, 1/2 an onion, olive oil, dried basil (I thought we had some fresh in the fridge, but alas, we had used it all), salt, and pepper. I didn't think it would be great but it was actually kind of tasty.
A little fresh Parmesan and it was ready to eat. Fresh Parmesan cheese is the only way to go! That dry stuff in a shaky tube is saw dust in comparison.

Thursday, November 04, 2010

Snowflake scarf, domestimication, and the rest of my day

Crafting

Crafts are always a nice way to start things off. Last night I began working on the 12 Weeks of Christmas patterns sent out by Red Heart. I can't actually figure out how to sign up for the patterns myself but my dear friend, Slayermel, is being kind enough to pass them on to me so I don't have to remember to check the web site. They're all free crochet patterns available on the Coats & Clark web site. The pattern for week 5 has already been sent out, but anal me has to start at #1.

Week 1: Falling Snowflakes Crochet Scarf
Yarn I'm using: Bernat Ice Christmas, worsted weight, acrylic
Hook I'm using: J/6.00mm as recommended in the pattern, I didn't bother checking gauge, it's a scarf, how much can gauge matter?
Where I am: After chaining 203 times (whew, and I didn't even miscount, but I double checked the number of chains before getting started), I went to bed last night near the end of row 2. That doesn't sound far, but the rows are loooong and the whole project is 3 rows and a round.
How it's going: Not bad. after completing the 3rd "fan" I realized I screwed up a bit. I originally put the 1st sc of the fan (after the dc's and turn) in the slip stitch not the first dc! So watch out for that. It was a minor frogging incident and then I got right back on track. But I must say, the white yarn with sparkle makes it really difficult to see the stitches. I think they were bang on designating this as an intermediate pattern. A beginner might find the instructions a bit confusing and if they choose white there could be issues with stitch placement.
Thoughts so far: My husband thinks it will be pretty.


Exercising

Today was all about getting back to P90x. I'm not following any set plan from the program any more, just using the workouts in general 'cause I think they're great!

Morning workout: P90x Legs and Back, ~60 min
Other exercise: biking to and from work, I'm lucky to have a bike lane on my route, one of the few in Toronto, ~15-20 min each way

Domestimication

I have been inspired to improve my efforts to take care of my home and myself by the book "Home Economics: Vintage Advice and Practical Science for the 21st-Century Household," compiled by Jennifer McKnight Trontz.
Home Economics: Vintage Advice for the 21st-Century Household

I picked it up at the Spadina House Museum. Spadina House is beside Casa Loma. It isn't as imposing an exterior, but it is a waaaay better museum. School children should be brought to Spadina House instead of Casa Loma, there's more history to learn there.

But I digress. The book offers great tips that may be from a while back in a different age but are still applicable. It also highlights the fact that home economics is actually an essential topic. It should be required school learning and it should be taught properly. When I took home ec in school all we did was cook and sew. But it's so much more: budgeting, managing a household, cleaning tips, decorating, proper care of household items, etc.

So, I'm trying to be more domestimicated. It's going okay. I'm planning meals on Sundays for the week, that takes the stress out of dinner. I always panicked about dinner, since I am NOT a cook. Knowing what I need to make in advance takes away the stress.

Tonight, we had tacos. Fiesta time! They were yummy.

Then after dinner, dishes. It helps to do stuff right away.

And now that I've bored everyone, I'm leaving.

Saturday, August 11, 2007

Ridged and Waffle Dishcloths

I love making dishcloths. They make for short and satisfying projects that have a purpose at home or make a great gift. I'm putting these two dishcloths in the same post because the patterns were together on the Bernat web site, and you can find the file here.

This is the ridged dishcloth:

And here's a close-up of the stitches:


Now for the waffle dishcloth:


And the close-up of the stitches:


Both were very easy to make. I found that to get the right gauge I had to switch to a smaller hook for the waffle dishcloth.

Materials:
  • "G" hook for the ridged dishcloth, "F" hook for the waffle dishcloth
  • worsted weight cotton, I used Bernat Handicrafter Cotton Ultrasoft in Summerset

Thursday, August 09, 2007

Egg Coaster

Here is a project I did sometime last year. It's a crocheted egg coaster. The pattern is from the Crochet Pattern-a-Day 2006 Calendar.

This was another fun and really quick project. I think it's really cute, but I'm still trying to decide if anyone would want a set of them as a gift. Any thoughts?

Materials:
  • Size "G" crochet hook
  • White worsted weight acrylic yarn, I used Phentex
  • Yellow worsted weight acrylic yarn, I used Bernat Super Value

Cupcake Pincushion

I was in desperate need of a pincushion, so imagine my delight when I came across this pattern for a crocheted cupcake pincushion (I know, I need to get out more). Unfortunately, I can't figure out how to get a good picture of it so I've got two shots to highlight different things.

This first one shows the colours that were used and gives a good shot of the "paper" base:

This second one shows the shape of the "icing" top better:

It was a really quick and fun project. Aside from being a nice pin cushion, I think it would make a great birthday gift. The pattern calls for sport weight yarn and a size "E" hook, but I just used some worsted weight yarn and a size "G" or "F" hook, I can't remember which I used. My cupcake is 3.5" tall.

Materials:
  • "G" or "F" crochet hook
  • Purple worsted weight acrylic yarn, I used Bernat Super Value
  • White worsted weight acrylic yarn, I used Phentex
  • Red bead for the "cherry" topper
  • Fibre fill

Tuesday, August 07, 2007

Love Bug

This is something I made for Valentine's Day 2007 and gave to my Sweetie:

I adapted it from a pattern from freepatterns.com. I thought the original pattern was rather over the top so I simplified it. I think it turned out to be a really cute little doll.

I gave him a rose that I got in a huge bag of buttons from Michael's craft store.

And this is what my Sweetie gave me:


Materials:
  • G size crochet hook
  • Red worsted weight acrylic yarn (I used Bernat Super Value)
  • White worsted weight acrylic yarn (I used Phentex)
  • Two google eyes
  • Little plastic flower

Sleeves when you need 'em

I often get chilly in the summer, sometimes from the air conditioning and sometimes from the cooler evenings. A sweater is just too heavy. A long sleeved shirt isn't right for throwing over a short-sleeved shirt or a tank top. What to do? Turn a long-sleeved shirt into a bolero of course!


Inspired by two bolero projects I found online, I made this bolero from an old long-sleeved jersey knit shirt. The shirt sat too short for my liking, so why not cut it off more? I chopped the bottom off to sit just below the bosom, be sure to leave more than you'd think necessary as it does tend to ride up. I cut it right down the centre of the front and made the V from the top of the bosom to the collar. I cut the collar off. I then hemmed all the cut edges, by hand since I find jersey-knit difficult to work with using my sewing machine. Finally I added the button and button-hole. I must admit that the button-hole could use some work. I did it by hand and had no idea what I was doing. It works but just don't look at it closely. If anyone can point me to the proper way to do a button-hole, please do! The button-hole is horizontal to avoid problems with the side getting pulled out of shape.

I must say that I'm very happy with the final result.

Materials:
  • old jersey-knit long-sleeved shirt
  • needle and thread
  • button

Saturday, August 04, 2007

Steggie!

This is a project from March 2007. I thought this pattern was really cute so I grabbed some scraps of yarn and got crocheting. Here's what happened:


I ran out of green yarn shortly into the project and finished off with some scrap verigated yarn. It didn't turn out as cute for me as it did for the original creator. So there was only one thing to do:


Give it to Mokey! It actually turned out to be a great toy for her. She usually tears plush toys apart but Steggie is still around and aside from being goobered on and dirty he's none the worse for wear. There are no seams to split like with fabric plush toys and when she chews him, her teeth slide through the stitches so they don't create holes for her to exploit. She absolutely loves chewing on him and despite all the chewing and pulling, Steggie hasn't come apart. So for all you dog owners out there, if you want a great toy, crochet one!

Hook size:
G

Materials:
  • Worsted weight yarn, I ended up using a dark green from Red Heart and a verigated from Bernat Super Value
  • Fibre fill

Monday, July 23, 2007

Sleeper of a Bag

This project is from Martha Stewart and while I don't know if I'd say "it's a good thing" I would certainly say "it's not too bad at all." I did have a lonely pillow cases around, so I can't think of anything better than to make a bag with it.


I got this project done in one evening with no seam ripping and no frustration. Yay! The one thing I wasn't too sure about was what to do with the diagonal edges of the pillow case that are inside of the bag. I debated about whether they should be sewed up too but in the end decided for less work and left them open. This leaves a couple of pockets (large and flimsy pockets, mind you) inside the bag and there's no harm in that.

Materials:
  • lonely pillow case
  • sewing machine
  • thread
  • straight pins
  • ruler
  • chalk

Saturday, July 21, 2007

Travel Tissue Cover

I've found a new and fantastic source of patterns! It's a blog called Craft Leftovers and it's got lots of great ideas for what to do with scraps of things you might have in your craft stash. Aside from the wonderful patterns, great ideas, and being based on a premise of using whatever happens to be laying around, the projects are fairly small and quick to do.

Here is my first finished project from a Craft Leftovers pattern (okay, it's actually the second, but the first was done as a pattern tester for the site so I won't reveal it until the pattern is posted):

They're Travel Tissue Covers! I made one for a friend and one for me. Now I must say, they look like a very simple sewing project, but for a novice sewer like me, there was plenty of frustration that went along with this project, not the least of which was the machine coming partially unthreaded without telling me causing the seams not to sew up properly and me having no clue why. That of course ended with a lot of ripped stitches, swearing, and all sorts of other untoward behaviour. But in the end I got them done and I think they'll work just fine. Making the second one went a lot smoother but still involved ripping out stitches.

The first one I made required some hand stitching in the final side seams where the folded over sections meet. It was just too tough for the needle I had to get through the fabric. But fortunately, some miracle happened with the second one and the needle slid through that section with no problem.

One thing that the pattern doesn't mention is that in the end, after making the final side seams, the whole thing gets flipped inside out. This is very important to know so that the fabric you want on the outside actually ends up being on the outside

I've found that the bottom lip of the opening puckers a little, nothing too serious, but enough to annoy my perfectionism when I was making the first one. I accepted this fact by the time I go to the second one.

Materials:
  • 2 pieces of 9" x 6.5" fabric (I used gold satin for the linings, red crepe satin for one and some shimmery stiff purple for the other)
  • Sewing machine (though you could hand sew)
  • Thread

Wednesday, June 06, 2007

Bernat Tulip Dishcloth

After the "Feather and Fan" fiasco, I gave the tulip dishcloth pattern on the same Bernat label a go. It turned out much better. It is a good size for a dishcloth and actually feels really good. There was an error in the pattern with the stitch count in one row, but because of the symmetrical pattern, it was easy to spot and fix. Thank goodness, because I would have been really ticked if neither of the knit patterns on that darn label worked out!

Here's a close-up of the tulip detail:


Needle Size:
5 mm

Materials:

Bernat Crochet Cotton

Sunday, June 03, 2007

Feather and Fan dishcloth

This is my first completed knitting project. The first project I started is a bag, but I'm still working on that. Hopefully I'll be finished and posting about it in the not too distant future.

This is from the Feather and Fan pattern from Bernat. It came on the label of the yarn. I must say that I suspect the pattern has a glaring errors. This cloth is very small and would be of little use for dishes because of it. The picture on the Bernat label shows a wider cloth with more feather and fan sections. I was not impressed with this one. But it is working out well as a TV screen duster.

Needle Size:
5 mm

Materials Used:
Bernat Crochet Cotton

Saturday, March 24, 2007

I can knit!

Thanks to the Knotty Hooker a.k.a. Emily RugBurn , I can now knit (well, this was actually a few months ago, but you get the idea). She showed me the basics and then introduced me to knittinghelp.com, which is a great how-to resource site, complete with super clear video instructions.

Being a crocheter first, I was having a hard time knitting with the yarn in my right hand. That's the way Em does it. I tried for a bit to do it this way but found it incredibly awkward and unnatural which made me the world's slowest knitter. It also made me tense up my hands so they would become sore and stiff very quickly. Luckily there's the Continental knitting method, which involves holding the yarn in your left hand. I switched to that and away I went!

Here's the first bit of knitting I did:


I followed the free Cable Scarf pattern (#60053) from Lion Brand (you need to sign up for a free account to view the patterns).


I didn't finish the scarf, since I was using a yarn that I wouldn't ordinarily use for a scarf and I didn't really want a cable scarf. This was just for practice, to get my knits and purls down!

Sunday, December 31, 2006

Random Filet Scarf

I recently finished my first venture into filet crochet, something that seems quite complicated and I wasn't sure I was ready for. Well, I didn't try anything delicate or complicated. There was no steel hook or thread involved. Instead I tried a rather simple filet scarf.


The pattern was from the Crochet Pattern-a-Day 2006 calendar. Once again, as with so many patterns from this calendar, it was loaded with mistakes. The pattern was labeled "easy" which is why I decided to try filet crochet. But the pattern instructions did not quite match the picture of the scarf. The problem is, for an introduction to filet, filet crochet is not at all described properly.

Luckily, filet is actually a simple concept of using a set number of stitches to represent blocks and the blocks are either filled in or open. It is a very logical type of pattern to follow. The key is following the grid, which is part of the pattern in a set way. The grid is like graph paper with some blocks filled in black and other left white. In this case, double crochet was used and I thought of the pattern this way: the lines of the grid were each a double crochet, a filled in block put two double crochets between each of the lines, and the open blocks were worked by making two chain stitches and skipping two stitches before working the next double crochet. This is not at all what the pattern described but is definitely what the picture showed.

Anyway, once I got the hang of it, the scarf worked through quite nicely. Initially I tried a worsted weight yarn but it was too heavy for this delicate scarf, so I switched to a lighter weight yarn. I actually used a beautiful Bernat yarn that I picked up from Value Village. The label looks rather old and I've looked on the Bernat site and it doesn't look like they make it any more. It's 76% cotton, 14% nylon, and 10% silk. The yarn is squiggly rather than straight and alternates between being really thin and thicker which leads to a great texture which is far clearer in person than in the pictures.


Hook size:
G

Materials used:
Bernat Cott'n Silk, 3 skeins of 1.75 oz.

Thursday, October 26, 2006

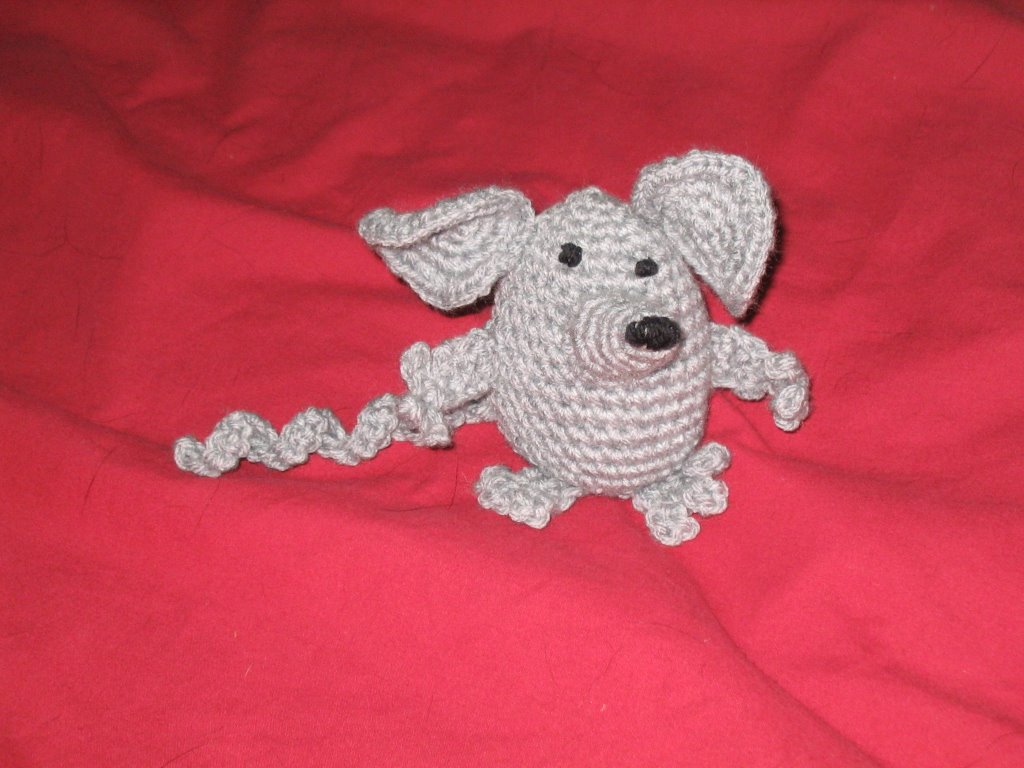
Pocket Mouse

Here is one of my previous crochet projects. It's a cute little mouse crocheted from a pattern I found on the internet: http://thecrochetworks.tripod.com/animals.html. It amazes me how there are so many fantastic patterns offered for free.

This little guy took only a couple of nights to do and was surprisingly easy to do. Each piece is done separately (body, nose, ears, arms, legs, and tail) and then sewn on, which if you're not fond of sewing can be a bit tedious. The sewing required for each piece is minimal but having to sewn on eight pieces is the tedious part. But it's well worth the effort for this cute little mouse. As you can see, the only real issue I seem to have had was lining up his eyes. Maybe I'll call him Drunky the Mouse.

I'm hoping to crochet his friends some day.

Hook size:
F

Materials used: Grey worsted weight yarn
Black yarn scrap, unraveled
Stuffing

Wednesday, October 11, 2006

"that's a wrap"

This is my second finished redesigned t-shirt project. The idea and instructions came from Generation T: 108 ways to transform a T-shirt by Megan Nicolay. It's project number 28 which involves transforming a t-shirt into a wrap shirt.


Now, I do love this book, it has great ideas and will help me reclaim the multitude of shapeless t-shirts that I just can't let go of but won't wear. The only issue I have is that the simplicity of the instructions means that things aren't exact which means the shirt won't always turn out exactly as it does in the picture. The other issue is that the models are skinny with less than ample bosoms. So the way the shirt looks on them is far different to the way the shirt looks on those of us who are less than skinny and actually require a bra.

The pattern calls for cutting and a bit of sewing for the belt. In reality, the large shirt that I used required more work. It was too bulky at the sides, especially after sewing the bottom of the armholes to make them smaller and fit better. When I realised the extent of this huge problem and how terrible it made the shirt look, I was disheartened. I felt better when I thought about just sewing the sides and cutting off the excess fabric to get a better fit. I was once again disheartened when I realised that t-shirts often get out of shape and no longer lay flat making them difficult to arrange to perfection. After much huffing and puffing and pouting, my trusty sewing machine did good by me and the sides to the shirt were sewn up. Much to my surprise the sewing job did the trick just as it was supposed to (note to those that would skip corners: I basted the shirt before sewing to make sure it would look right, this is not a step to be skipped as doing so could result in much yelling, crying, and throwing of things). It is not a perfect shirt. It will need to be worn with a tank underneath or with the "v" pinned to keep the "ladies" from peaking out. It would also look better if I were skinnier. But, it's wearable, though I'm not sure where I would wear it to. It does have kind of a martial arts pyjama feel to it which I think can be minimised by wearing it with a skirt rather than pants.

Materials used:
XL T-shirt
red Gutterman thread
blue thread (for basting)
needle
sewing machine
tailor's chalk
straight pins
ruler

Wednesday, September 20, 2006

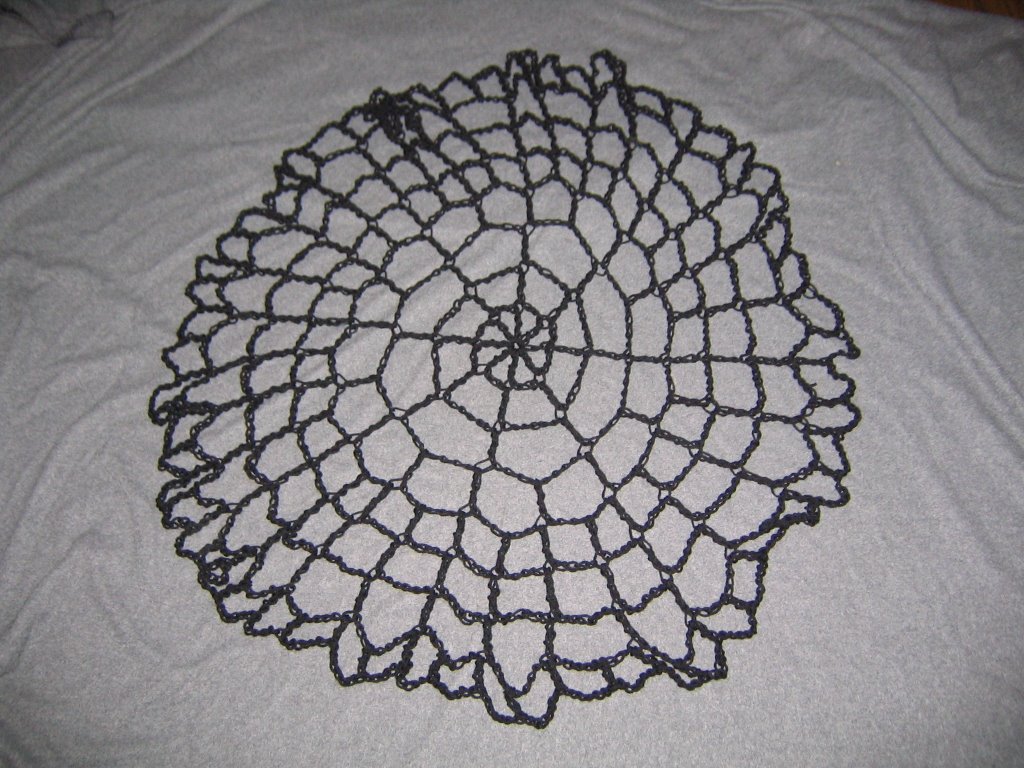
Spiderweb Table Topper

It has begun. I have actually gotten my butt in gear soon enough to get going on holiday themed crafts before the holiday has come and gone. Because once the holiday is over the motivation for the themed crafts is gone and another year has to go by before I can think about doing them again.

In just over a month it will be Hallowe'en. Yay! Here is my very first Hallowe'en crochet project:

It's a spiderweb table topper. I was able to complete the project in just one evening. And I found out that not only does it look great on a table, but it's fantastic thrown over a lamp shade (please be very aware of the fire hazard putting it on a lampshade may pose). The whole thing is done with ch and tr and although it's listed as being medium difficulty, I found it very easy to do. My only advice is mark the first chain of each round to make navigating around the web a bit easier. It is possible to get a little lost if the web twists around at all.

Hook Size:
N

Materials used:
Black worsted weight yarn

Monday, September 18, 2006

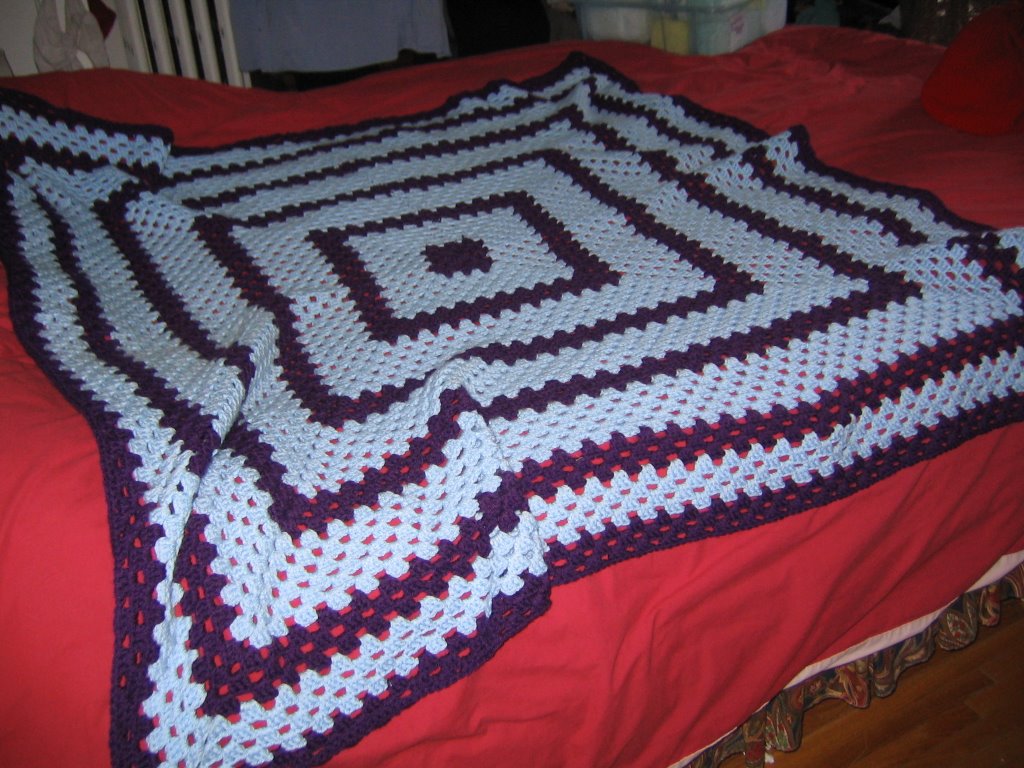
Granny Square Afghan

This is one of the afghans that I've crocheted.

This was made from the Granny Square Afghan pattern in the Crochet Pattern-a-Day 2006 calendar. At first I was very frustrated with the pattern but that was mainly because I didn't really understand the concept of granny squares. As soon as I figured the basics out, it was easy sailing!

The one issue is that it's supposed to be a square afghan but if you lay this one out it's a little "off-square." Mind you that doesn't matter when you're curled up in it.

The idea with this pattern is to keep going until the afghan is as big as you want. The last couple of colour rounds on mine aren't to the width that the pattern specifies, but I'd had enough of buying yarn (or should I say getting Mel to pick up yarn) for this pattern that I just decided to end it.

Materials used:
Bernat Super Value worsted weight yarn in Sky (Thanks Mel!)
Bernat Super Value worsted weight yarn in Damson

Sunday, September 17, 2006

Net Shopping Bag

I finally finished this bag!!! After starting it a while ago, I lost the size F hook I was using. I ended up moving onto other projects that used different sized hooks. Finally I went to a nearby knitting store, Knit-O-Matic, and picked up a size F hook. I treated myself and got one made out of bamboo. It's so increadibly light.


This was made from the Net Shopping Bag pattern in the Crochet Pattern-a-Day 2006 calendar. I've found that many of the patterns in this calendar are a bit wonky and I have to make some small adjustments on them to make them work out in a way that I like. With this one, the instructions for the handles were a bit odd but I adapted and they seemed to have worked out okay. I'll know for sure once I take this bag grocery shopping, with any luck my groceries won't end up all over the ground. There was also supposed to be a bag case crocheted into the bottom of the inside of the bag. I left that out.

Materials used:
Bernat Super Value worsted weight yarn in Honey

Saturday, September 16, 2006

Crocheted Watch Cap

A year ago I had attempted to make a hat using a bulky yarn. The ribbing of the hat went well enough but when I tried to do the main part of the hat I found out the importance of using a yarn weight that actually goes with the pattern. The hat was just not working out. Well I finally looked up a pattern for a hat that uses a bulky weight yarn and luckily enough I was able to use the ribbing I had already created.

The pattern I used was the Crocheted Watch Cap from Lion Brand Yarn. You have to sign up for a free account on the Lion Brand web site in order to view their patterns. The black part of the hat was done following the larger size option in the pattern. The orange ribbing was made according to the Convertible Ear Flap Ski Hat pattern from the Crochet Pattern-a-Day 2006 calendar. The size turns out to fit a man's head.

Materials used:
1 ball Patons Bohemian in Copper Chaos
1 ball in black very similar to Patons Bohemian (I can't remember which one it was, can you Mel?)